Lately I've been trying to catch up on things I neglected in the last 2 months. One of them is the Lucky Stars Block of the month with Don't call me Betsy blog.
I was having a hard time making February's block because the colors are far from my palette. I mean I like blue, yellow, and even gray, it's just they are not my first choice to be in a block together with no other color added. I finally bit the bullet and made the block about 2 weeks ago (was too lazy to photograph it until now).
I got into a routine and started to make the block for March and got this far.
With this much of scraps:
I was on pressing the last 4 sections of the block before assembling it together, when my iron just gave up on me. We were together for about 6 years and I have to admit I dropped it a few times in the past few months. I guess in the result of falling hard the sensor for shut off gave up and my iron instead of turning off when it reached the right temperature it kept heating and when it got so hot it started to beep. I unplugged it right away since it didn't react to the turning lower command :) I let it cool a little bit, then plugged it in and now it gets a little warm, but doesn't even heat up enough to press on the lowest setting. I was devastated since I was on a high as you could see in my post a few weeks ago!
I wanted to buy a new iron, so I went to the local Target. I found one I particularly liked, but when I took it out of the box I noticed a design change. I've been wanting to buy an iron that has no indentations for the steam holes, but rather just a simple plate with holes on it. So the holes were fine, but for some reason whoever designed this new type put grooves outlining the shape of the iron. UGH! I wanted to get the specific type of plate because when I press the regular irons leave indentations on the fabric and I noticed a slight stretching. I press with up and down motion and don't move my iron so my fabric needs to stay flat, not bumpy after pressing. Frustrating, isn't it? Am I too specific? I have no idea what's the purpose of the stupid grooves.
So after many suggestions from my twitter friends I went to the Vermont Country Store website and ordered a dry iron which haven't arrived yet. I'm really eager to get it.
To sum up my experience I wanted to share a few things that can be useful if you wanted to do paper piecing.
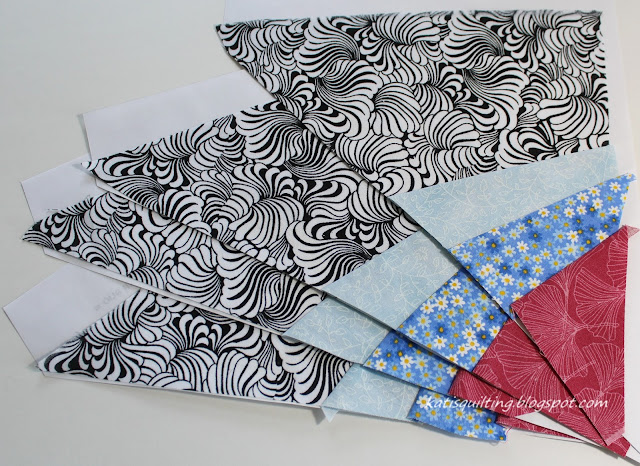
After listening to Jackie Kunkel on American Patchwork and Quilting Radio (link on the left sidebar) She said something that stuck in my head. She's a paper piecing teacher and using a method where they print out an extra of the pattern and cut it up to use to cut the fabrics. Genius! So I printed an extra copy of the blocks I wanted to be working on and carefully putting it down printed side up on the WRONG side of the fabrics needed to be cut. I left about a half inch seam allowance and cut the required number of shapes. I labeled them (1A, 1B, etc...) according to the pattern and voila! Piecing went a lot faster!
The second thing I discovered is not necessarily about paper piecing, but about my Singer 201 sewing machine. There's a screw on the left of the stitch length handle which I never needed to use. But with paper piecing I like to take a few back stitches at the starting and finishing of the seam lines. So I discovered if I set the screw to the same level as my stitch length is set it kind of has a block. I tightened the screw and this way when I lift the handle to back stitch, it will make the same length for back stitching as my stitches going forward. Does it make sense? Hope it does! Specially because paper piecing needs such small stitches for making it easier to tear out the paper later on and if I didn't set the screw my back stitches were gigantic :)
That's it for Today, I'll be back later after I got my new iron and will finally be able to iron my fabrics, fuse my fusible for a new tote, and all that jazz!
'Til we blog again! :)


Good idea on paper piecing. I always print out a reference copy just so I know where I am in the block and where the pieces are supposed to fit in.
ReplyDeleteLove the blue and yellow Lucky Star. Excellent job!
ReplyDeleteI too am far behind on the Lucky Stars. I keep telling myself I'll get back to it as soon as I get the wedding quilt off to be basted. Really!
ReplyDeleteI too am very far behind on the Lucky Stars. I think that will be next on my list after I get the wedding quilt pieced and off to be basted.
ReplyDeleteThat is a bummer about your iron :( Hope your new one arrives soon! Love the star block,and all the progress on the second one,it looks like a pretty one as well!
ReplyDelete