Friday, August 31, 2012

Log cabin quilt basted and in the process of quilting

I'm on a roll, baby! Although I won't say "ain't no stopping us now" just yet :) I got  down on all  4-s 2 days ago and basted the largest quilt I've ever done up to now. It took me a good 3 hours and had to crawl all over the top because of lack of space. Oh, and did I mention I had to buy more  basting pins? Lucky we had to go  to Walmart to get water filter and we passed the craft section  on the way in. I picked up 3 boxes of 50 of the basting pins. I had what I thought a huge amount already and let me just say it adding the 150 freshly bought was hardly enough. I could put about 20 more in into one of the corners in the border, but I decided to start quilting regardless and  as I remove pins where I'm quilting, I'll put them in where they are needed.
Fiance tried to talk me into having 2 layers of extra high loft batting which I was OK with first. I just wanted to make a test square about 6" to see how it quilts up on my machine. Needless to say that I could hardly put the basting pins through all the layers. I thought to myself, there's NO WAY I will baste a quilt that size like this! Regardless, I tried to quilt the test sandwich, but had the frustration of skipped stitches again. I had a larger spool threaded and it was moving too much. I tried to put a straw on the thread holder and put the spool on it like that, but was still moving. Finally I decided to try a different way. I got a mug  and placed the thread inside, putting a basting pin through the straw on top of the machine and pulled the thread through the circle part of the pin. ARGH, it still skipped stitches. The last thing I tried was just out of frustration. I put the spool back on the holder with the straw still attached and left the basting pin hanging on the thread to add some weight. It worked like a charm! I knew the reason for skipped stitches was that the spool was moving while the thread was unwinding (I only have and upright position on my vintage machine and this type of thread is cross wound which means it would work best with a horizontal spool holder) and I had the thread loose at times and that's when the machine decided to screw up. Now I have the small basting pin hanging and problem is solved! I was so desperate that my Fiance suggested to buy more Sulky thread, but I have so many newly bought thread and I didn't want to waste those. Not that I don't like Sulky, but I would need to spend a lot of money to buy the colors I need.
So Today was the day I started the quilting. I did Angela Walters' swirl pattern in one of the corners just to realize that it's too dense for this quilt. It came out pretty good compared it was my first time trying this pattern. I will not take out the stitches and that corner will be stiff :)
I'm using neutral thread for the light areas with kind of a spiky quilting and dark gray thread for the dark areas with a large meandering pattern.


Now I've got to go back to finish the light half of it :)

'Til we blog again! :)

Friday, August 24, 2012

More Dresden pictures

Hello again,
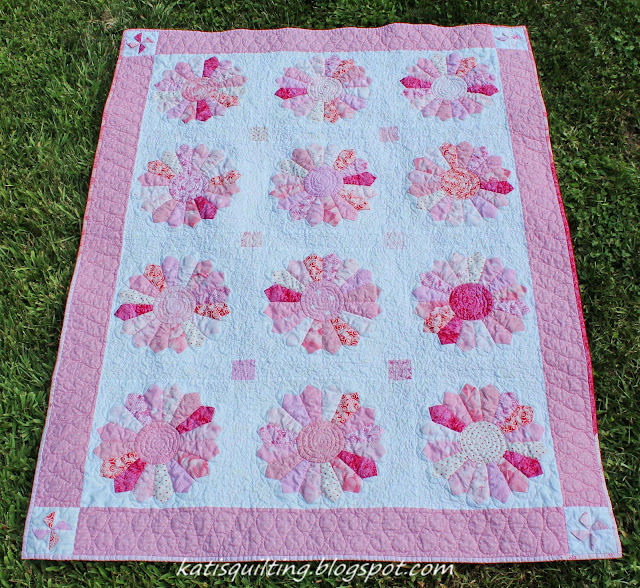
As promised I'm back with more pictures that I took outside this time after washing the quilt. Unfortunately I couldn't take a vertical picture because of the lack of hanging up opportunities. 
We met Birthday Girl and her Mom at the park where we gave it to them, Mom was crying :)) She liked it very much. It makes me totally happy to know that it will be appreciated. She even said that it's big enough for her :)
There were a few things I wanted to answer before I  post the pictures. Someone was asking which fabric line I was using. I picked the fabrics out of my stash, no particular fabric line, I don't think even 2 of them were from the same manufacturer. There was another question about the quilting. I quilt my quilts on my Singer 201-2 sewing machine (picture is here in my first blogpost). I have not made any quilts with marking. Yet. That's coming up in the future I'm sure :) I do not follow any patterns, just totally free motion quilting.

With no further ado here are the additional pictures, enjoy!

Dresden plate baby quilt


In case you're visiting for the first time, you can see the before pictures by clicking on this link
I'm linking up to Off The Wall Fridays ,  TGIFF Fridays @ Crafty Shenanigans,
Hand Made Parade @There and back , Sew Can Do Craftastic Monday
'Til we blog again! :)

Thursday, August 23, 2012

Dresden quilt FINISHED!!

Hi Everybody,
I'm glad You're here! I'm sooooo excited to share some pictures about the quilt I finally finished :)) I still have to wash it so stay tuned because  more pictures are coming up in a future post, but I'm just too excited not to share these. I've been wanting to take pictures for 2 days, but it was dark when I finally put the last stitches in, and yesterday I just wasn't home during the day.
The quilting process was kind of slow, it took me 2 days to finish because we needed to run errands in the meantime. I was really happy I have a seam ripper again since it involved a lot of un-stitching. I was using Sulky rayon 40wt variegated thread on the top and solid pink on the bottom, same kind. Somehow when I went over a lot of seams in a short period of time, the thread shredded and I had to re-start again. That involved a lot of starts and stops. I tried to make a flower out of the 3-D pinwheels in the corners, but ended up picking out the stitches because of too many layers, and also the floppy pinwheel blades kept getting caught in the free motion foot. Other than those troubles the quilting went smooth. I expected to finish it a lot faster, but it's all right, I'm done! And that's what counts! I ended up binding it by hand because I just didn't feel like playing with my  machine about picking out what kind of decorative stitch to use to secure the binding.

First, here's the back (which in REAL life looks like it's trapunto). I pieced the leftover "blades" and the test 3D pinwheel block. For the record, the top and bottom fabric are the same. Also the quilt looks kind of wobbly since 2 hangers weren't enough, but 3 were one too many :)


Here are some close-ups of the quilting of the block itself and the border.


The front:

Close-up:


Close-up of the borders:


Close-up of the blocks:


And the 4 corners with the 3-D pinwheels:


3D pinwheel


Hope you enjoyed the show and I'll be back hopefully tomorrow night with more pictures of the washed quilt. I'm also planning to give it to the Birthday Girl and hope to snap a picture of her too!
UPDATE: You can see  the after-the-wash pictures by clicking here.
I'm linking up with TNT Thursday and Can I get a WHOOP WHOOP?
Thanks so much for visiting and come again soon! :)

'Til we blog again! :)

Wednesday, August 15, 2012

Dresden quilt BASTED!!!, Wonky log cabin block

Hello there dear readers,
I'm glad you all are here! :) How is everybody doing? Have you thought of that  the Summer is almost over? I can't believe it... time goes by so quick!
I bit the bullet today and basted the Dresden plate quilt. Why am I dreading the basting part? Because I don't have a large enough table? Or am I just procrastinating? Does it happen to you? I ended up taping the backing on our area rug and baste the quilt on the floor. It was my first time using this method since I think this is the largest quilt up to date. Hope it's basted well enough, we'll see in the quilting process. We had some thunderstorms moving through while I was working,  but didn't see and hear too much of it because I was listening to the Fellowship of the Ring audiobook. It didn't take as long as I thought it would, I used up almost all of my basting pins. Note to self... need to buy more to baste the log cabin quilt!
I took a  picture of it after I was done, pardon the light conditions because of the above mentioned thunderstorms...


After I was finished I still wanted to keep listening to the book so I decided to get over myself and make the wonky log cabin block for Craftsy BOM May. I took out my box with the scraps from the previous blocks and worked from those. I even ran out of some of the fabrics which is good and bad at the same time :))
Presenting the Wonky log cabin block:


Off to go to bed now, I had a rough night last night with thunder and lightning so I'm hoping to get a good night's rest!

'Til we blog again! :)

Saturday, August 11, 2012

More Craftsy BOM blocks done

Hi everybody,
Hope you all are staying cool these days because I'm swimming in sweat right now :) and  I haven't even been out running... I've been working on my Craftsy BOM blocks for August which feature stars. I've made the  Ohio star block before so I  though it would be no challenge... EXCEPT! Amy is using a method where you have to trim the hourglass units to size since there's a little room to play with. I like this method because it could be very precise. I can't remember if in her demonstration she mentions that when you trim you don't only have to put the 45 degree mark on the bias angle, but you need to make sure that the 2 1/4 mark is in the middle of your block. Otherwise you'll end up like me cutting off the points of your block. I realized this after trimming all 4 of them, but thought what the heck... I'm not making a whole quilt out of this one block, so I'll just let it go. I started to sew the rows together, but didn't quiet get to the end when I realized I still had to take a shower before going to bed. It was 10 o'clock already and I decided not to finish the block that evening. Yesterday morning when I  got to it somehow the wind or the kitties knocked the blocks on the floor. I moved my chair without noticing this and accidentally put the wheels on top of the fallen pieces. It was hours before I realized what happened. When I looked at the fabric it was obvious that I'll have to re-make them since they had grease all over them from the wheels. I believe it was a sign to teach me that it's NOT OK when the points are cut off because of a mistake. I re-made the units and now it looks alright.

Here it is in full glory, the Ohio Star block:


Now... the Double Star block gave me a  little trouble. I decided to use my freshly bought Connecting Thread blue thread for the blocks which is a little bit thicker than my Aurifil. I had to make 12 flying geese units for this block. We used the method when you have to draw a line across the square and sew on the  line to get the flying geese unit. Now usually when I have a thread like I was using which is a little thicker than usual I sew a hair closer to the corner next to the line so when I fold the background fabric back it goes exactly to the corner. Smartly I didn't use this method for these and I  payed for it after pressing the units since I had to re-sew most of them. The block came out OK, it could be better, but again since I only made one block I'm not going to fuss over it. I don't think I ever want to make a whole quilt with this block since it took FOREVER to cut out all the pieces and then to make everything come together. I may have been a little faster if I did things as I was used to as oppose to the instructions...

The Double Star block:

Ohio Star Craftsy block

Finally a time lapse video about  our hike up to the  top of Mount  Snow in Vermont. Click on the picture and wait until  it starts moving, it's pretty cool!


That's all for Today, next I'll baste my Dresden quilt and quilt it.

'Til we blog again! :)

Friday, August 10, 2012

More Zentangle pics, paper pieced Friendship block testing

Hello to you dear  readers,
With all that  heat here I didn't get much sewing done in the last few days since there's no cooling in  my sewing room. I was thinking about getting a portable one, but realized our electric system would not be able to handle it. We live in an older house with only 3  fuses for our apartment (we're renting) and don't have the option to update.
Instead I was drawing in the office with the A/C on :) I really enjoy making the Zentangle designs and thinking about getting more books to learn to draw even more. I was never a strong drawer in school, but I know my Mom can sketch really well. Once She sketched a picture of my baby sister sleeping and it totally looked like her.  It's interesting because I always liked to color as I can remember. Painting was not my cup of tea since I don't like to get my hands dirty.... All right, except  when baking. 
The other day we were at the playground with my friend who's daughter is 1 and went to the sand box. I realized that I have no memories with sandboxes. Guess I didn't like playing in the sand when I was a kid. Maybe something to do with no dirt on my hands? Who knows... And for the record, I use gloves for gardening. :)
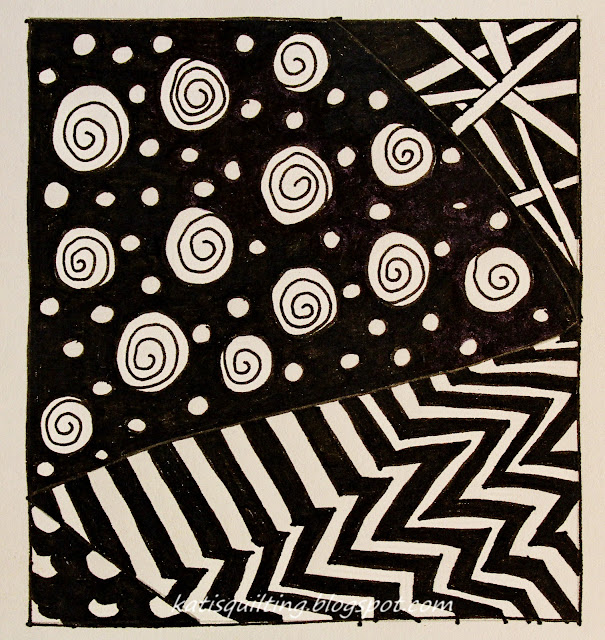
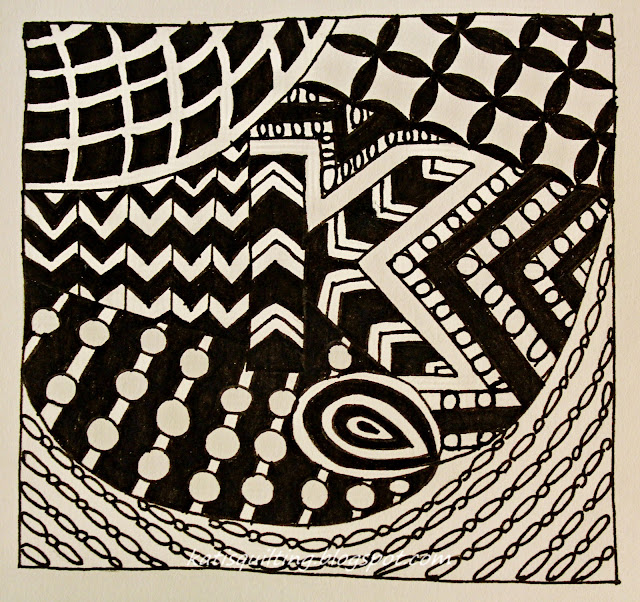
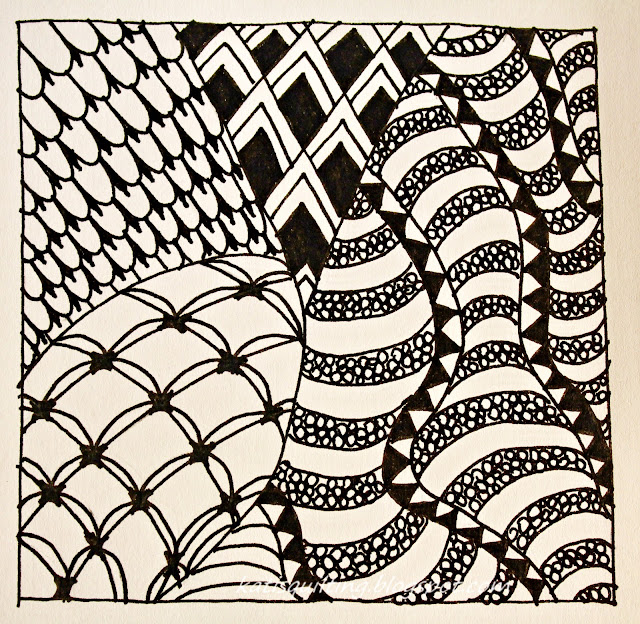
Below presented  the masterpieces I created :)

Zentangle


Zentangle


Zentangle

Another topic...I've been chatting with a few people back and forth  through blogland. I really enjoy meeting other quilters. I happened to  meet Kristy from Australia who blogs at Quiet Play. She's really into paper piecing and have been designing some awesome new patterns. She also has a blog hop with paper pieced block projects for your  orphan blocks. 

 Practically Paper Piecing

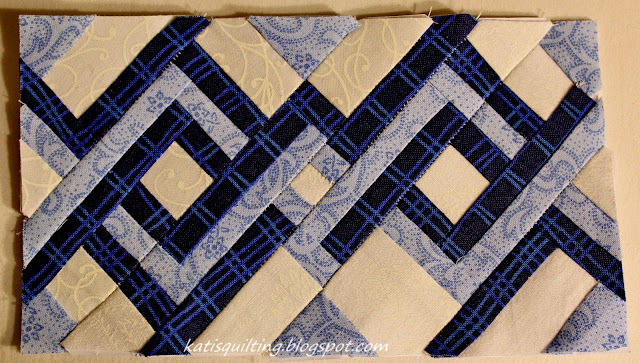
The block I tested for her is the Friendship block, it measures 4"x6". She's planning to publish the free pattern in her September blog post. If you like my version keep an eye  out for her! She designed the block in solid colors, but I didn't have any  blue solids on hand so I used my scraps. It needs little pieces, this  way I could use up my smaller scraps.

This is what it looks like:

Friendship  knot paper  pieced block

I should've used blue thread since the stitches show  with white. Now that I looked at it just realized the I messed up in the middle. I used light blue fabric instead of dark blue. Arrrrgh! I am definitely not going to take it apart :))) Guess I payed  more attention to matching the seams than the fabric placement. Never mind :)
I'll be back a little later with my Craftsy  BOM for August, they're still in the works.

'Til we blog again! :)